Ok, so I’ve had this blog up for several weeks and I’ve posted a half dozen posts about all kinds of different gear, but have failed to post on the most crucial thing…actually making photographs. So, here’s a post on the basics of making a photograph on a digital camera.
Two Components of a Photograph:
If taken down to its very essence, a photograph requires only two components, light and time. A photograph is made when the sensor of the digital camera is exposed to light for a certain amount of time. There are three basic controls that determine how much light gets to the sensor of the camera and for how long. Those three items are 1) aperture, 2) shutter speed, and 3) ISO. Those three factors are referred to as the exposure triangle. To make things easy, I’ll describe each item separately and then discuss how the three interact to create a photograph.
Aperture:
Aperture is the size of the opening in the rear of the lens that allows light to pass through to the camera sensor. Aperture is described in f stops. The higher the number of f stop, the smaller the opening at the rear of the lens is, and therefore, less light is transmitted to the sensor. The lower the number, the larger the opening at the rear of the camera, therefore, more light is transmitted to the sensor.
Aperture also controls the depth of field of a photograph. The easiest description that I could come up with for an example was to imagine that the sensor of your camera was actually a very tiny artist who is drawing the image of your photograph. If you have a very wide aperture, represented by a low number f stop, the little artist is not going to have very much time to draw the picture otherwise too much light comes in and the tiny artist goes blind and only sees white light and would then just paint a white blob. Because the tiny artist does not have much time to “draw” your photograph, the tiny artist draws the main subject of the photo and then just has blur behind the main subject. Think of a portrait. By way of example, I have placed a photo of an eagle that I saw at a wildlife rescue in Alaska.
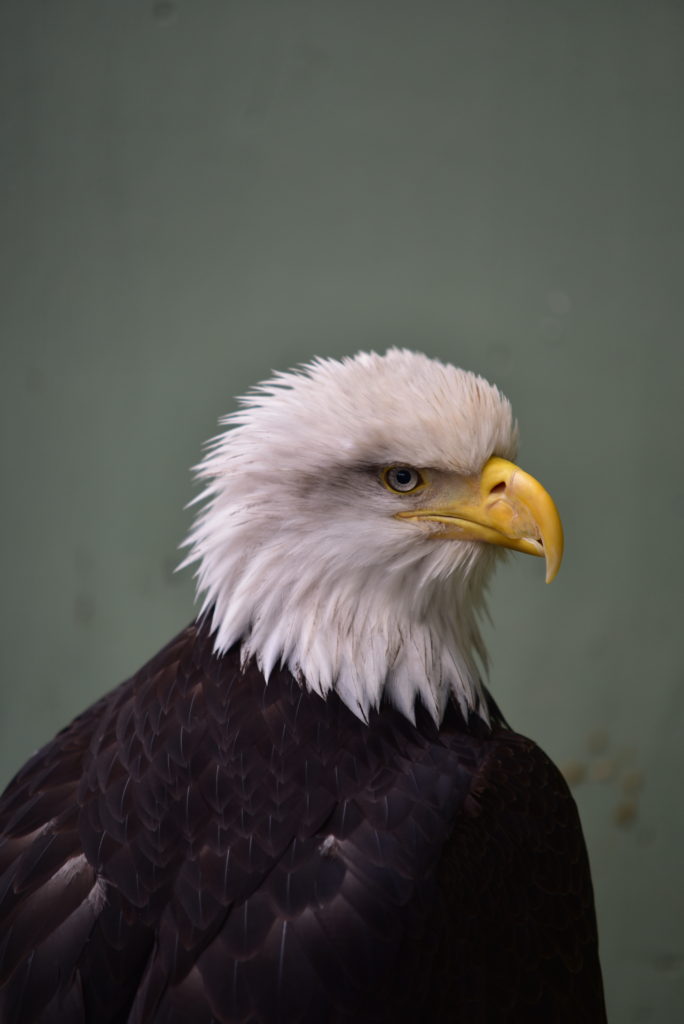
Notice that the eagle is crystal clear, but the wall behind him is totally blurred. That photo was shot with an open aperture (again represented by a low number f stop). The tiny artist in my camera only had time to draw the main subject of the eagle in detail and left the background blurry. This is called shallow depth of field and works great when you want to isolate your subject from the background.
Another example is this Calla Lilly which was also taken with an open aperture. The Lilly stands out it great detail, but everything behind it (including a car that was parked at the curb a little way behind the flower planter) is blurred out.
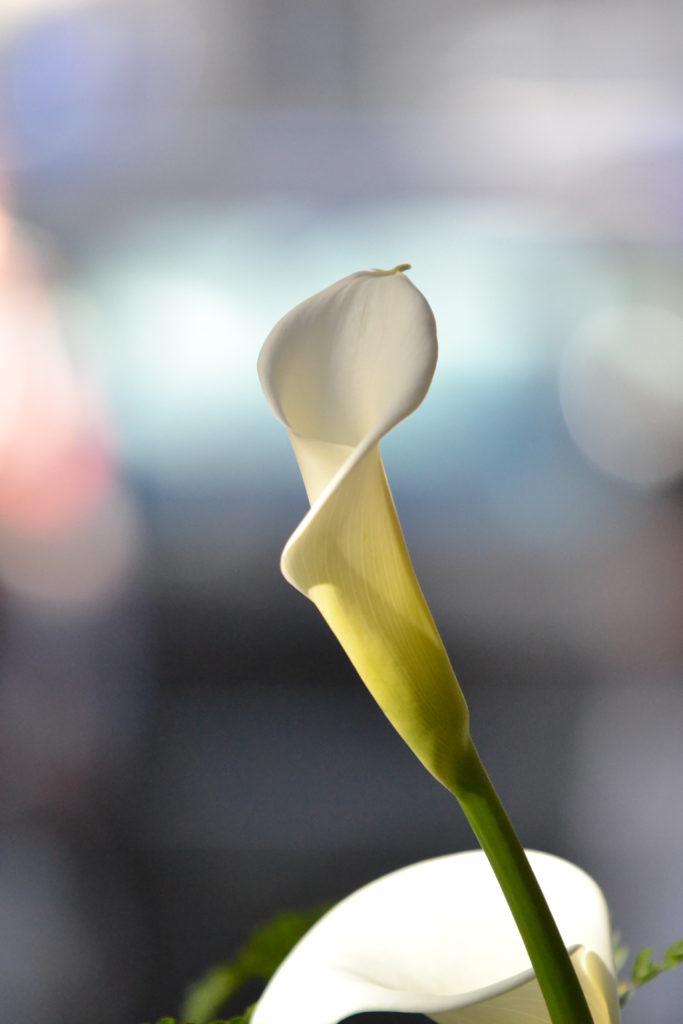
That background blur is called Bokeh and is created by shooting with a very open aperture.
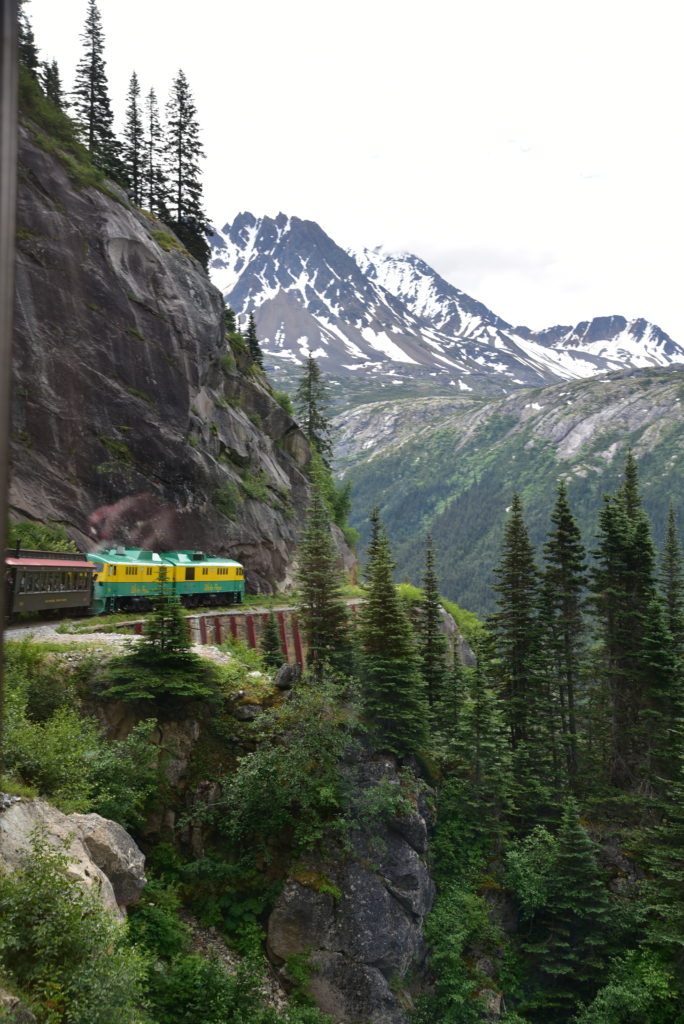
A higher number f stop which represents a smaller opening at the rear of the lens creates a deeper depth of field. Because the opening at the rear of the lens is smaller, the shutter can remain open longer before the tiny artist goes blind. As such, the tiny artist can draw the entire image in detail. This is used in landscape photography or any time that the photographer wants everything in the image to remain clear and in focus. As an example of this, you’ll see a landscape photo that I took in Alaska below.
Shutter Speed:
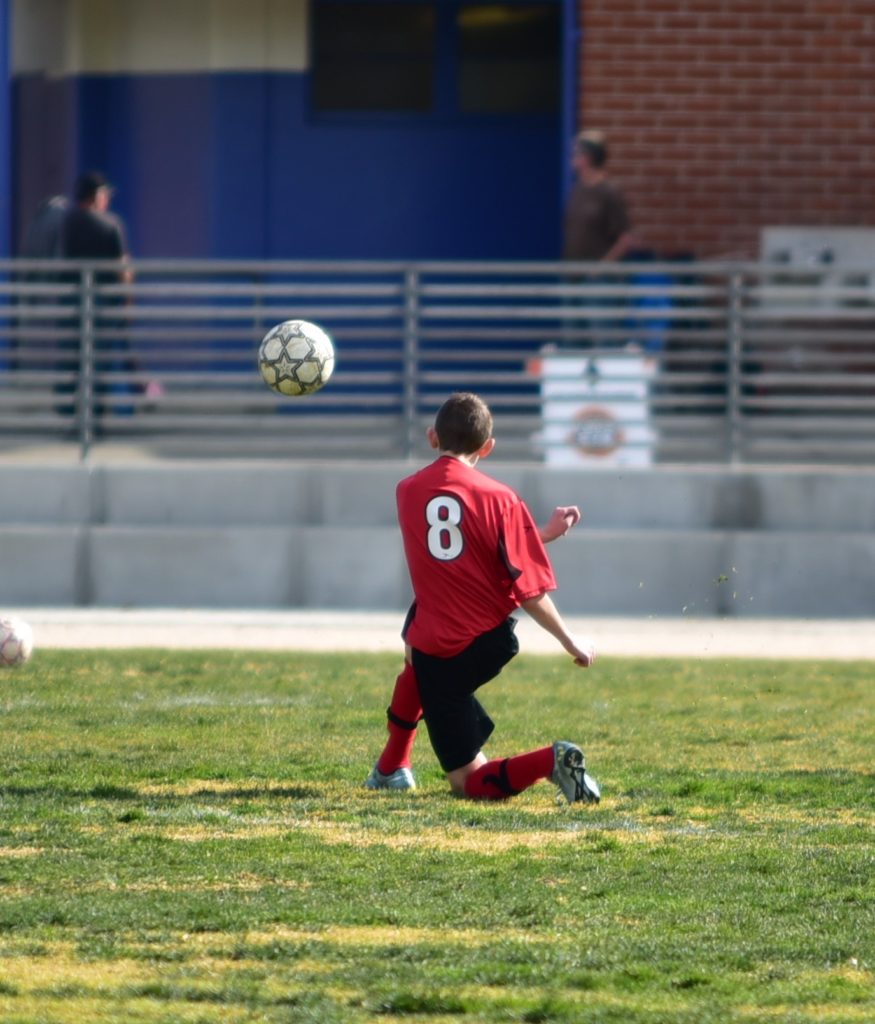
Shutter speed is exactly what it sounds like. How fast the shutter opens and closes. Faster shutter speeds will freeze motion for shooting things like sports. An example of this is the photo of the soccer below.
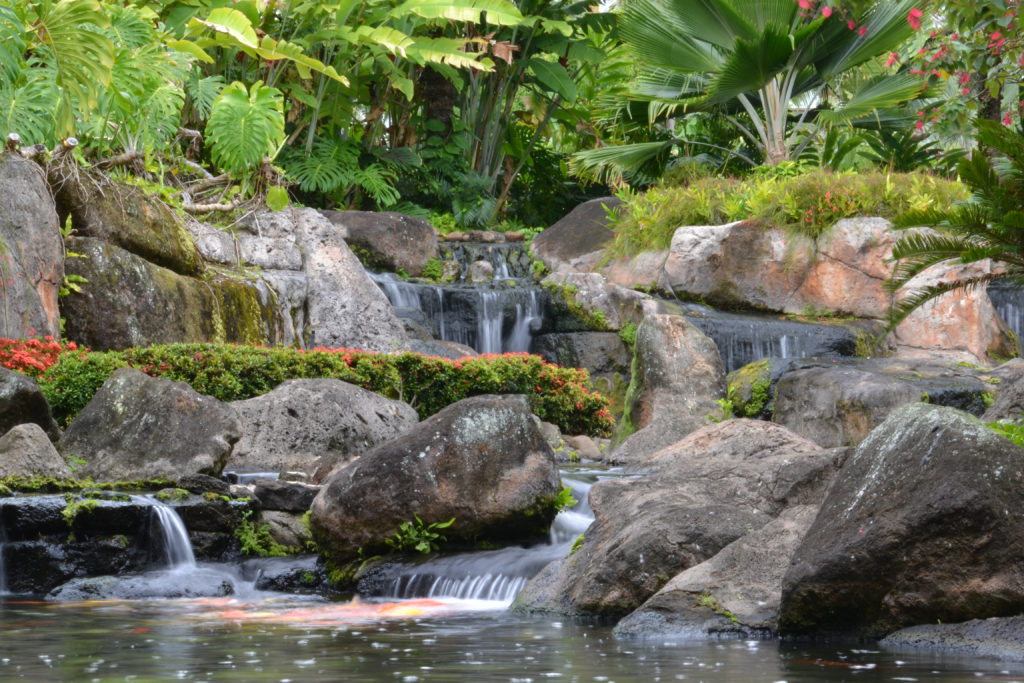
Slow shutter speeds can allow for motion blur which makes for that smooth water look as in the koi pond photo below.
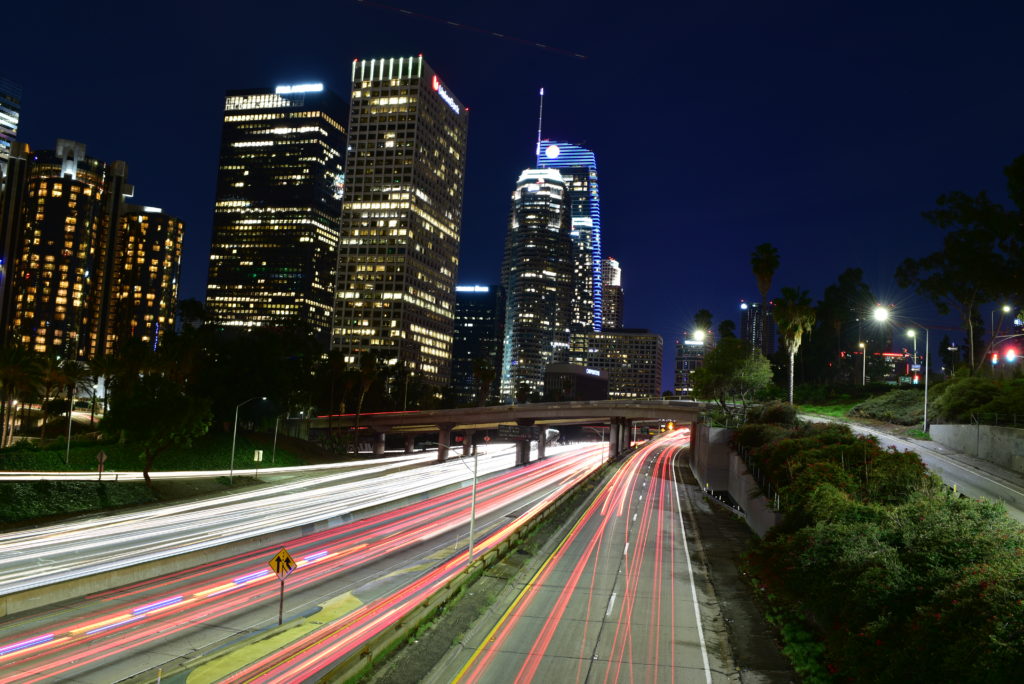
Slow shutter speeds also allow for motion blur such as light trails in cityscapes such as the one below.
ISO:
ISO is the sensitivity setting for the camera sensor. In the old days this was done through film speed. Now, the digital sensor is adjusted to be more or less sensitive. With ISO, a low number represents decreased sensitivity to light while a high ISO number represents greater sensitivity to light.
With ISO, the higher the number, or the increased sensitivity of the sensor to light, leads to increased noise in the photograph. Noise is the grainy quality that can be seen in some photos. If the ISO is set low, the photograph will have less noise and be clearer.
The brighter the subject of the photograph, the lower the ISO setting can be so that the photograph can be as clear and noise free as possible. ISO can be set manually in the camera, or your camera will likely also have an automatic ISO setting. On auto ISO setting, your camera will read the aperture setting, the shutter speed setting, and the built-in light meter and set the ISO to what should be proper for securing an image. Personally, I shoot with auto ISO and check the ISO setting in the viewfinder or on the display at the top of my camera to make sure that the ISO setting is not too high that it will cause noise. If the ISO setting chosen by the camera appears to high, I will adjust either the aperture or the shutter speed, or both, to get the image to be clean.
Putting It All Together:
Moving one or more of the triangle factors out of range will result in an incorrectly exposed photograph. At the extremes, a wide-open aperture, with a slow shutter speed and high ISO would give you an overexposed photograph that looks like a white blob. On the opposite end, a narrow aperture, fast shutter speed, and low ISO combination would give you an underexposed image that looks like a dark blob without any detail. By combining the exposure triangle factors in the proper way, you will get a properly exposed photograph that shows your creative vision.
If shooting a portrait or wanting your subject to stand out against the background, you’ll use a combination that involves setting an open (or low numbered) aperture and then change the shutter speed and ISO to properly expose your image. Conversely, if shooting a landscape or wanting to have the entire image in focus, you’ll use a combination that involves a smaller (or higher numbered) aperture and then change the shutter speed and ISO to properly expose your image.
A great way to see the differences in settings is to set your camera in one of the automatic modes and see what the camera would choose as a setting for that mode. For example, if you set your camera to portrait mode, you can then see in the viewfinder the settings that your camera believes are proper for making a portrait. Likewise, you can set your camera in landscape mode to see the settings that your camera believes are proper for making a landscape photograph. If you do that, you’ll see that the settings will be as I described above. The portrait will have a more open aperture and faster shutter speed while the landscape mode will have a smaller aperture and a slower shutter speed. Seeing those automatic mode settings is a great jumping off point. You can then move the camera into a different shooting mode such as aperture priority or shutter priority to change those settings to get exactly the image you want to create.
As always, questions and comments are welcome below.